

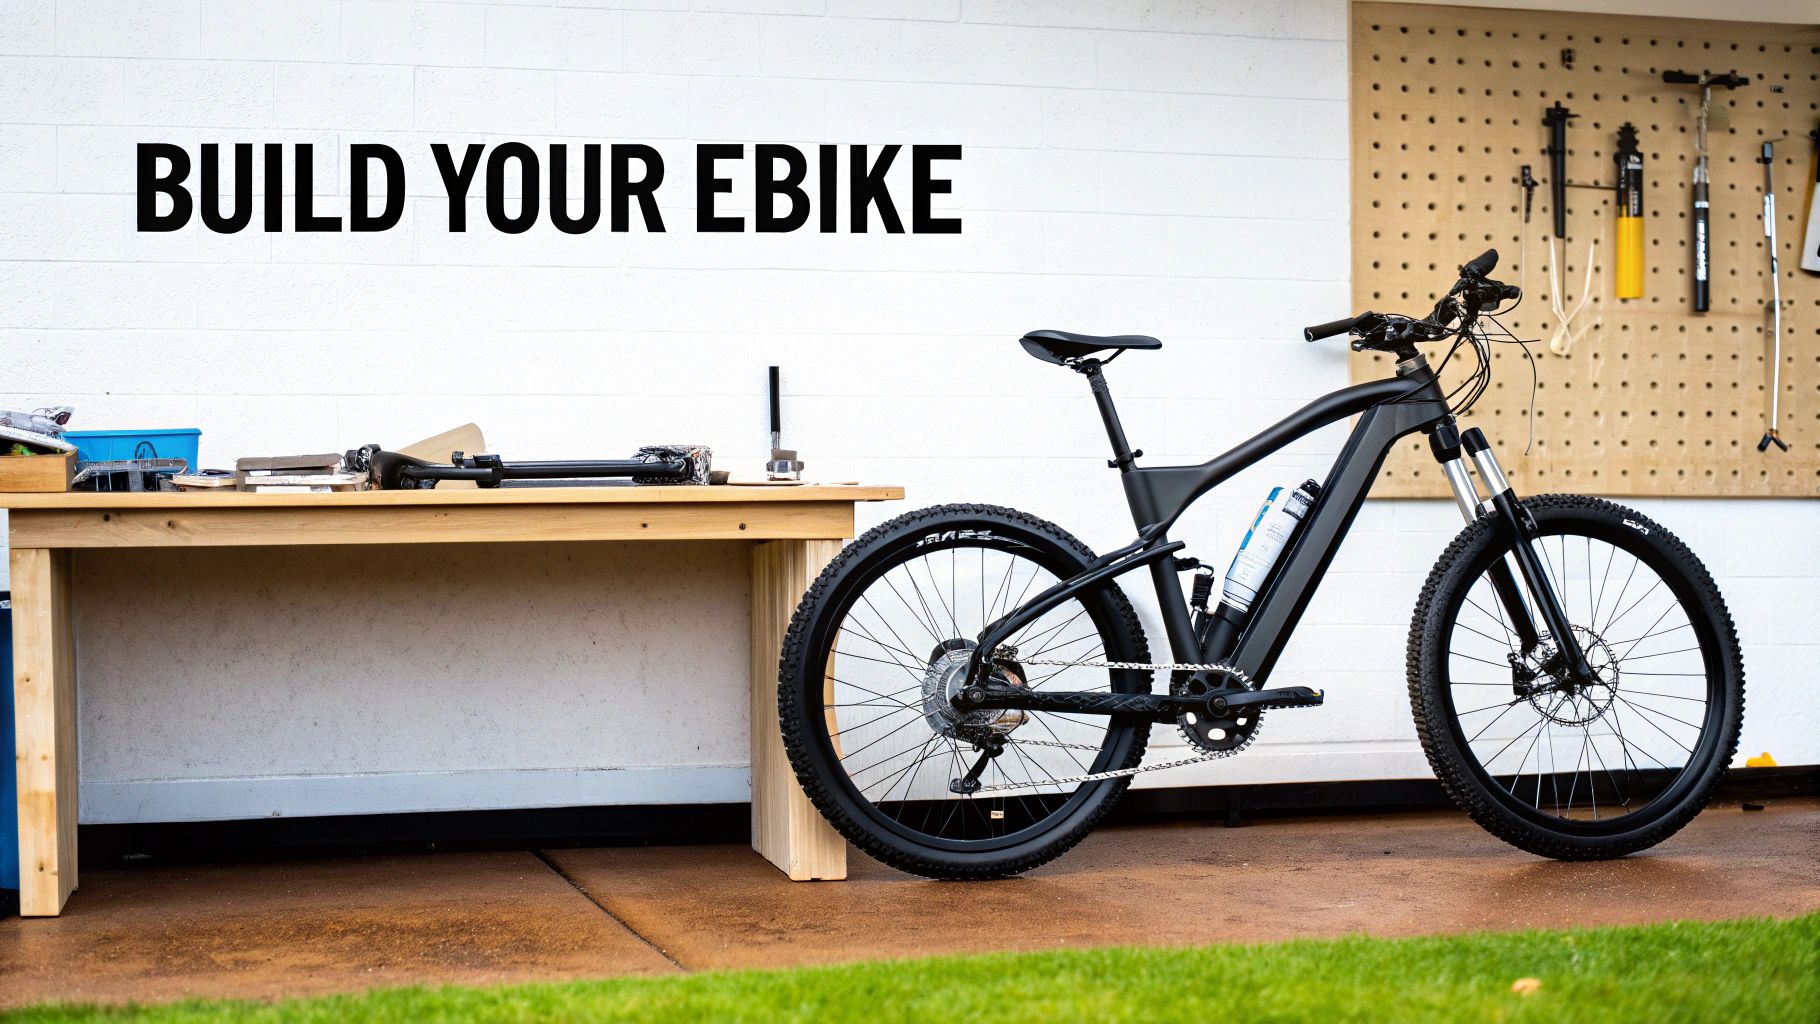
Building an e-bike from scratch is one of the most satisfying projects a DIY enthusiast can take on. You're not just assembling parts; you're creating a custom machine perfectly dialed in for how you ride, whether that's weaving through city streets or tackling rugged trails. This guide is your roadmap, breaking down the entire process from a pile of parts to a fully functional, personalized electric bike.
Why Build Your Own E-Bike?
Going the DIY route gives you a level of control and satisfaction that buying off the shelf just can't match. It's a chance to get your hands dirty, learn how these machines really work, and build something that’s a true extension of yourself. You get to choose every single component—the motor, the battery, the frame—to create a bike that nobody else has.
And honestly, there’s never been a better time to jump in. The e-bike market is exploding, projected to grow from USD 54.7 billion in 2025 to USD 124.6 billion by 2035. This boom means components are more available and affordable than ever. Just look at batteries: lithium-ion costs have plummeted over 80% in the past decade, so you can find a solid 36V or 48V pack for under $300. You can dig into more of the numbers on this growth over at Future Market Insights.
The Perks of a Custom Build
Building your own isn't just about pinching pennies, though that's a nice bonus. It’s about creating something that pre-built bikes can't offer. You'll also learn the ins and outs of your bike, which makes troubleshooting and maintenance down the road a breeze.
Here’s what you really gain:
- Complete Control: Want a high-torque mid-drive for tackling monster hills? Done. Prefer a quiet hub motor for cruising around town? You can have that, too. Every choice is yours.
- More Bang for Your Buck: By sourcing the parts yourself, you can often build an e-bike with better performance and higher-quality components than a store-bought one at the same price point.
- Real-World Skills: You're going to learn a ton—from wiring controllers to fine-tuning a derailleur. These are practical mechanical and electrical skills that will serve you well beyond this one project.
Building your own e-bike changes you from a rider into a creator. The connection you have with a machine you built with your own two hands is incredible. It makes every ride feel like an accomplishment.
What to Expect on This Journey
This guide is here to walk you through it all, step-by-step. We'll start with the most important question: what kind of bike do you want to build? A long-distance commuter? A weekend trail warrior? Once we nail that down, we'll dive into picking parts, getting the right tools, assembling everything, and the all-important testing and tuning.
Forget the overly technical jargon. This is a practical guide built to give you the confidence to see this project through. By the end, you won’t just have an e-bike—you’ll have your e-bike.
Choosing Your E-Bike Motor and Battery
This is it. The single most important decision you'll make for your entire build is picking the right motor and battery. These two components are the heart and soul of your e-bike, defining its power, speed, hill-climbing grit, and—most importantly—how far you can actually ride it.
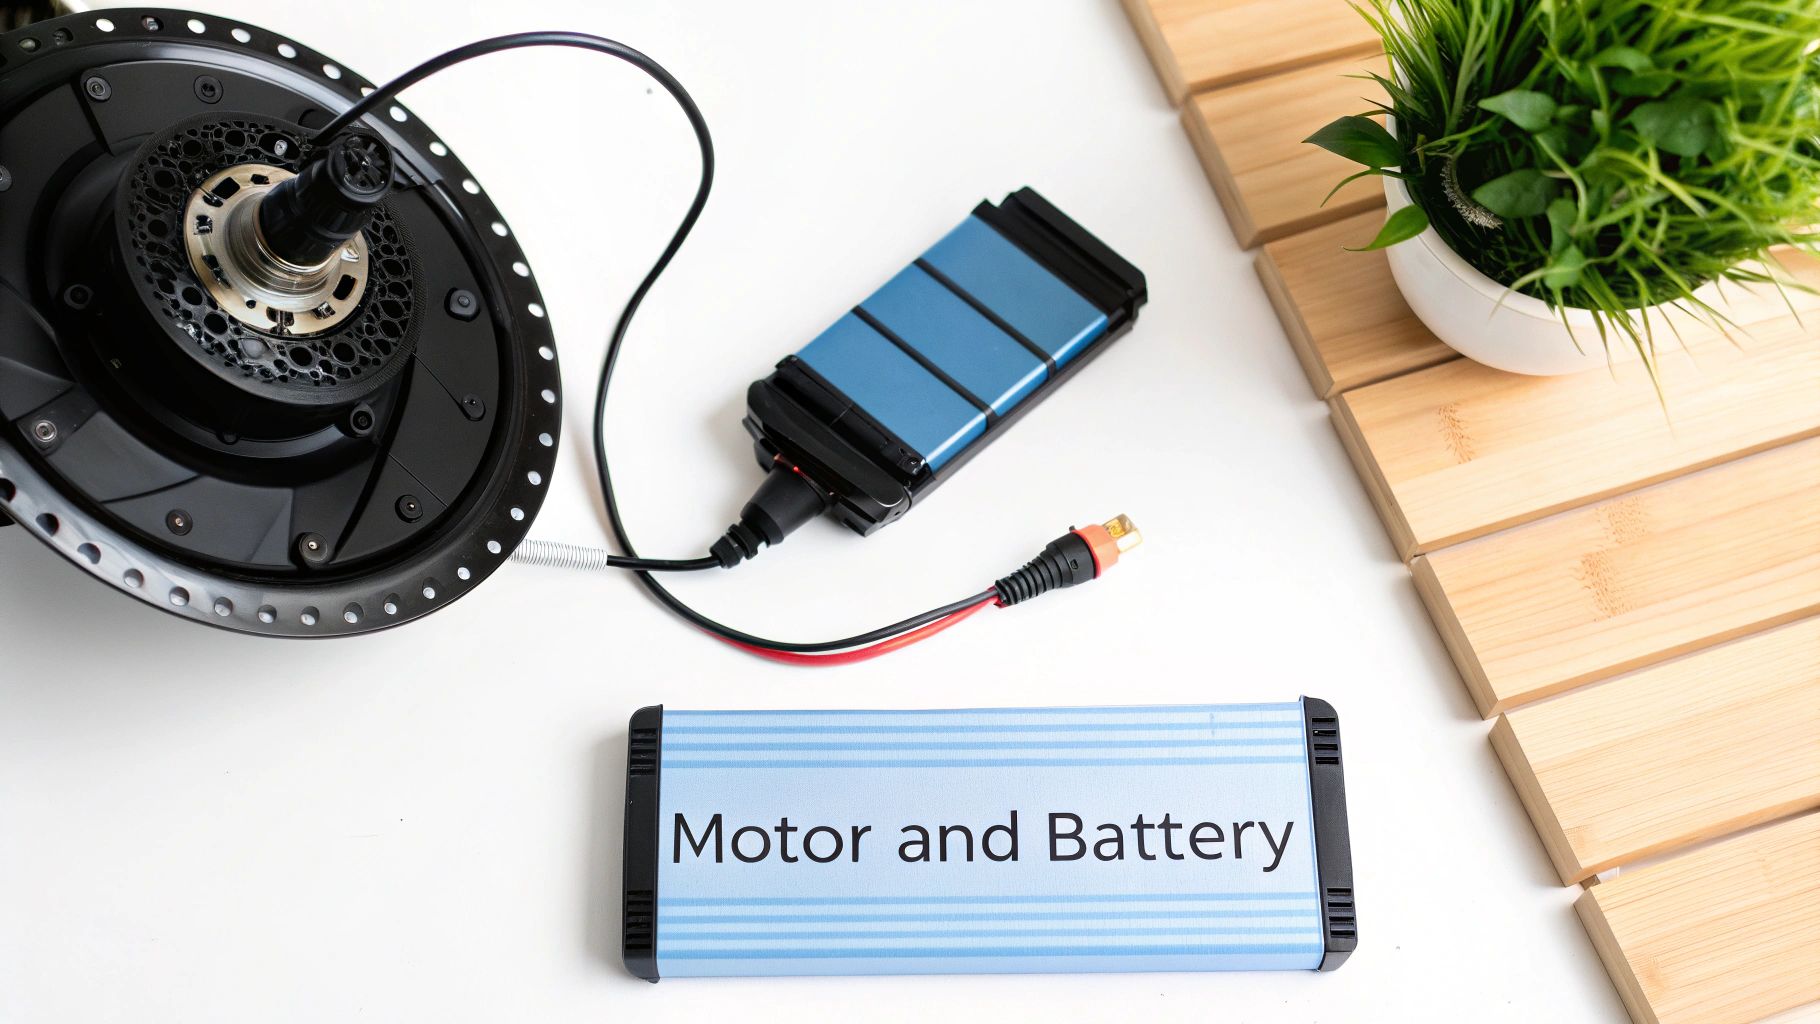
Getting this combination right is all about creating a balanced system. You want the motor’s power demands to be perfectly met by the battery's capacity and output. It’s a common rookie mistake to pair a beast of a motor with a tiny battery, only to watch your range plummet. On the flip side, strapping an oversized battery to a low-power motor just adds unnecessary weight.
Let's break down the real-world differences between motor types and decode battery specs so you can build a powertrain that feels like it was made just for you.
Hub Motors vs. Mid-Drive Motors
Your first fork in the road is choosing between a hub motor and a mid-drive motor. Hub motors, as the name suggests, live inside the hub of your front or rear wheel. Mid-drives are mounted down low, right where your pedals and cranks connect to the frame. Each has a completely different feel and set of trade-offs.
Hub motors are the go-to for many first-time builders because they are simpler and generally more affordable. Mid-drives are the climbers. They tap into your bike's existing gears, giving you incredible torque for tackling steep hills with ease. This choice will fundamentally change how your bike handles and what kind of maintenance you'll be doing down the road.
To make it clearer, let’s put them head-to-head.
Hub Motor vs Mid-Drive Motor Comparison
This table breaks down the key differences to help you figure out which motor aligns with your bike, your budget, and how you plan to ride.
| Feature | Hub Motor (Geared) | Mid-Drive Motor |
|---|---|---|
| Installation | Easier; replaces a standard wheel hub. | More complex; requires removing the bottom bracket. |
| Hill Climbing | Good, but can struggle on very steep or long inclines. | Excellent; uses the bike's gears for high torque. |
| Handling | Adds weight to one wheel, which can affect balance. | Centralized, low weight for better balance and feel. |
| Maintenance | Simpler system; fewer moving parts to wear out. | Puts more stress on the chain, cassette, and derailleur. |
| Stealth Factor | Can be very discreet, especially smaller models. | More noticeable due to its central mounting position. |
| Cost | Generally more affordable. | Typically more expensive for a comparable power level. |
Ultimately, there's no single "best" choice. A hub motor is fantastic for a commuter bike on relatively flat terrain, while a mid-drive is the undisputed king for electric mountain bikes or anyone living in a hilly area.
Understanding E-Bike Battery Essentials
Think of the battery as your fuel tank. Its specs tell you everything about your bike's potential range and power. When you're shopping around, you'll see a lot of numbers, but the three you really need to care about are voltage (V), amp-hours (Ah), and watt-hours (Wh).
Voltage is like the "pressure" behind the power. A higher voltage system, like 48V or 52V, is more efficient and usually gives you punchier acceleration compared to a 36V system. Amp-hours are all about capacity—how much juice the battery can hold.
The most honest metric for comparing batteries is watt-hours (Wh). It gives you the full picture of the battery's total energy. You can calculate it yourself: just multiply the voltage by the amp-hours. For example, a 48V x 10Ah pack equals 480Wh. More watt-hours means more range.
The e-bike market is exploding right now. Projections show the global e-bike motor market ballooning from USD 12.79 billion in 2025 to USD 33.41 billion by 2032. This is great news for us builders! This growth is driven by accessible tech like geared hub motors—which you’ll find in about 70% of DIY builds—and legendary mid-drives like the Bafang BBS02B, which puts out 750W and a massive 120Nm of torque. For a deeper dive into these trends, check out the e-bike motor market research on fortunebusinessinsights.com.
Calculating Your Expected Range
"So, how far will it go?" It's the number one question everyone has. While your actual range depends on everything from hills and wind to your own weight, you can get a surprisingly accurate estimate. A good rule of thumb is that you'll use somewhere between 15-25 watt-hours per mile on an average ride.
Here's a real-world example:
- Let’s say you picked a 48V, 15Ah battery.
- First, get your total capacity: 48V x 15Ah = 720Wh.
- Now, divide that by a conservative estimate of 20Wh per mile.
- Your estimated range is 720Wh / 20Wh/mile = 36 miles.
This gives you a solid baseline. If you're a speed demon who loves hills, you might burn through 25Wh/mile and get closer to 28 miles. If you're a relaxed rider who uses pedal assist sparingly on flat paths, you could sip energy at 15Wh/mile and stretch your range to nearly 48 miles.
Beyond the Numbers: Quality and Safety
Volts and amps are just part of the story. The guts of a battery pack are what separate a reliable workhorse from a dangerous fire hazard. When it comes to your battery, two things are absolutely non-negotiable: quality battery cells and a robust Battery Management System (BMS).
The BMS is the battery’s onboard computer. This little circuit board is the unsung hero, protecting the cells from being over-charged, drained too low, or getting dangerously hot. A cheap, no-name BMS is the number one cause of battery failures and fires. Don't skimp here.
A few tips from experience to help you choose a safe, long-lasting battery:
- Stick with Reputable Cell Brands: Insist on batteries built with cells from trusted names like Samsung, LG, Panasonic, or Sony. They perform better and are held to much higher safety standards.
- Verify the BMS Specs: A good seller will proudly list the BMS features, like cell balancing, short-circuit protection, and temperature sensors. If they can't tell you, walk away.
- Check the C-Rating: This tells you the battery's maximum safe discharge rate. You have to make sure the battery can handle the peak amperage your motor will pull without breaking a sweat.
I get it—this can all feel like a lot to take in at first. If you want to dig a bit deeper, our comprehensive https://ebikegang.com/blogs/news/electric-bike-buying-guide has more insights that are just as useful for building a bike as they are for buying one off the shelf.
Gathering Your Tools and Setting Up a Workspace
Alright, before we even think about bolting on a motor, let's talk about prep. Honestly, the success of your e-bike build is decided right here, before you touch a single component. A good workspace and the right tools aren't just a nice-to-have; they're what separate a fun project from a frustrating ordeal. Get this part right, and the rest of the build will go so much smoother.
Trust me, trying to build a bike on a cluttered garage floor with a flashlight in your mouth is a recipe for disaster. You’ll lose small parts, strip bolts, and generally have a bad time. Find a clean, well-lit space where you can easily walk around the bike from all sides. If you can swing it, a bike repair stand is a total game-changer. It holds the frame steady at a comfortable height, saving your back and making it a breeze to spin the wheels and work on the drivetrain.
Essential Mechanical Tools
Building an e-bike is part bike mechanic, part electrician. You probably have a lot of the basic mechanical tools already, but a few bike-specific ones are non-negotiable, especially if you’re installing a mid-drive motor. Think of it as an investment—these tools will serve you well for years of maintenance.
Here’s the core toolkit you’ll be reaching for constantly:
- Hex/Allen Wrench Set: You'll use these for everything, from mounting your handlebars to torquing down motor bolts. They are the workhorse of any bike build.
- Torque Wrench: This is non-negotiable. It’s the only way to tighten critical components like your motor mounts and stem to the exact specs without cracking expensive parts or having them come loose on a ride.
- Crank Puller & Bottom Bracket Tool: If you’re installing a mid-drive, you absolutely need these. There's no other way to get your bike's original crankset and bottom bracket out.
- Pedal Wrench: It might look like a regular wrench, but its thin profile and long handle are designed specifically for the serious torque needed to get pedals on and off.
- Chain Breaker Tool: You'll almost certainly need to resize your chain to work with the new motor and gearing, and this is the only tool for the job.
For a deeper dive into the gear you'll need for both this build and future tune-ups, our guide on choosing a complete cycle maintenance kit covers all the bases.
Electronics and Wiring Gear
Now for the fun part—the "e" in e-bike. The electrical work requires more finesse and a different set of tools. You don't need a degree in electrical engineering, but the right equipment will make your connections clean, safe, and reliable.
Your goal is to create clean, secure, and weatherproof connections. I can't tell you how many times I've seen a build plagued with issues all because of a sloppy wiring job. Take your time here—it pays off.
These are the must-haves for getting your bike wired up:
- Wire Strippers & Cutters: Essential for trimming wires to the perfect length and removing insulation without nicking the copper strands inside.
- Soldering Iron & Solder: Even if your kit is mostly plug-and-play, a soldering iron is invaluable for repairing a broken wire or creating a truly custom, rock-solid connection.
- Multimeter: This tool is your best friend for troubleshooting. It lets you check battery voltage, confirm connections, and hunt down electrical gremlins before you even finish the build.
- Heat Gun & Heat Shrink Tubing: This is the pro-level move for finishing your connections. It creates a durable, waterproof seal that electrical tape can only dream of.
And finally, a quick but important note on safety. Please, wear safety glasses and gloves. Metal shavings, solvents, and the potential for a stray spark are no joke. Protecting your eyes and hands should be the very first thing you do before starting any project that involves mechanical force and electricity.
From a Box of Parts to a Finished E-Bike: The Assembly Process
Alright, you've got your components, your workspace is ready to go—now for the fun part. This is where a pile of carefully selected parts starts to look and feel like a real e-bike. We're going to tackle this logically, starting with the heavy mechanical bits before diving into the electronics.
The biggest mistake I see people make is rushing this stage. Take your time. A patient, methodical approach now will save you from chasing down stripped bolts, misaligned parts, and those maddening electrical gremlins later on.
Before you even pick up a wrench, lay everything out. A little organization goes a long way. This simple visual breaks down the prep work that sets you up for a smooth build.
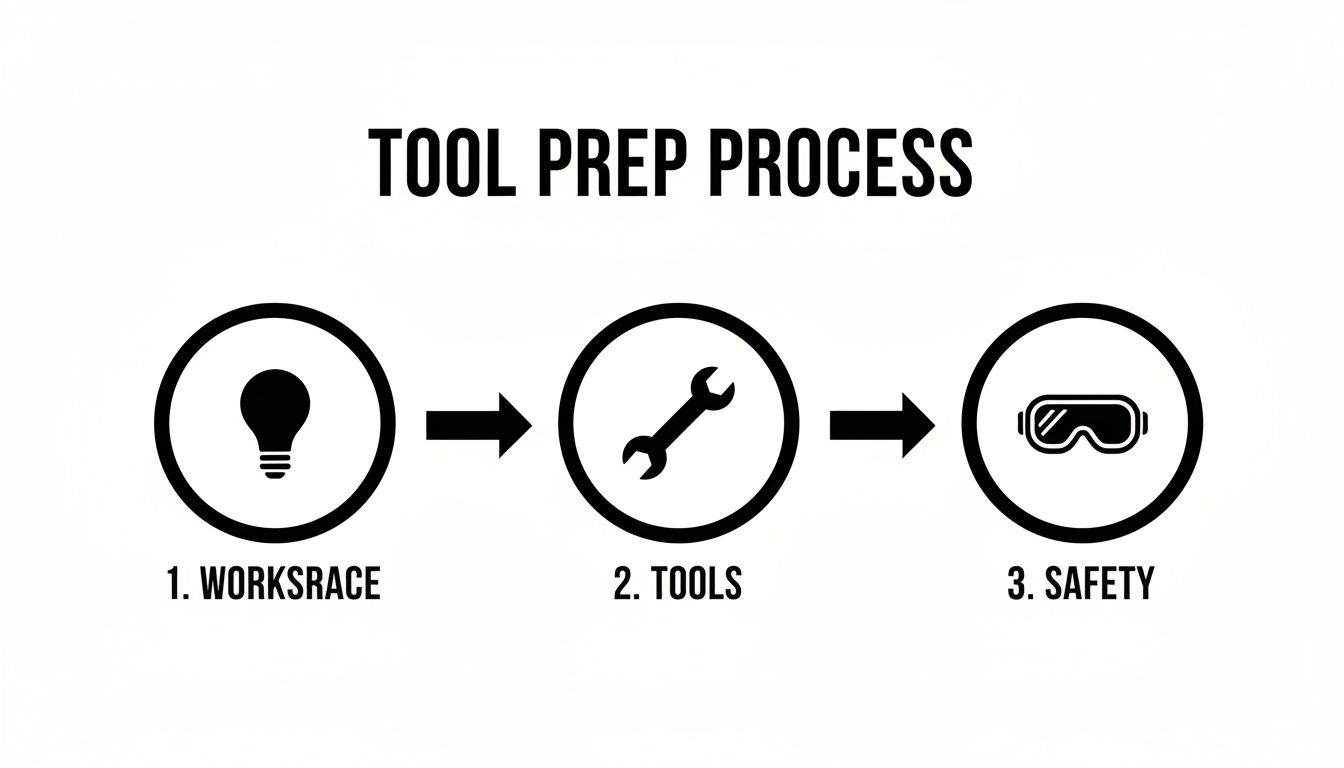
Think of it this way: a clean space, the right tools, and proper safety gear aren't just suggestions; they're the foundation of a successful DIY project.
Getting the Motor and Drivetrain Installed
First things first, let's get the motor mounted. Its position is the anchor point for almost everything else, especially wiring. How you do this depends entirely on whether you went with a hub motor or a mid-drive.
If you have a hub motor, you'll be swapping out one of your bike's original wheels. This means moving the tire, tube, and your cassette or freewheel over to the new motor wheel. Pay very close attention to the axle—the flat sides need to lock perfectly into the frame's dropouts. This prevents the whole axle from spinning under load. And please, use a torque arm. For any motor over 500W, it's not optional. It’s the only thing stopping the motor's power from chewing up your frame's dropouts.
A mid-drive installation is a bit more involved but totally doable. You'll need to pull off your crank arms and remove the entire bottom bracket assembly. This is a job that absolutely requires a specific tool like a crank puller and a bottom bracket tool. With that cleared out, you can slide the motor into the shell and secure it. I can't stress this enough: use a torque wrench on the lockrings and tighten them to the manufacturer's spec. This area is under a ton of stress.
A Pro Tip from Painful Experience: Before you even add a mid-drive kit to your cart, confirm your frame's bottom bracket width and type. Most kits are designed for standard BSA threaded brackets. If you have a press-fit frame, you'll need an adapter. Getting this wrong is a frustrating and expensive detour.
Once the motor is solid, you can reinstall the cranks and start sorting out the chainline. A straight chain is a happy chain. You will almost certainly need to shorten your chain with a chain breaker tool to get the tension right. This is crucial for crisp shifting and preventing your chain and sprockets from wearing out prematurely.
Mounting the Battery and Controller
With the motor in, it’s time to find a home for your battery and controller. The golden rule here is to keep the weight as low and central as possible. It makes a huge difference in how the bike handles.
The downtube is the prime real estate for the battery, using the water bottle cage mounts. It’s the perfect spot for maintaining the bike's balance. Use high-quality bolts and a dab of thread locker on them for extra security. Once it's mounted, give the battery a good shake. If it wiggles at all, it's not tight enough.
The controller is a bit more of a puzzle. Some people hide them in a frame bag for a clean look, while others bolt them to the seat tube or under a rear rack. Here's what you need to think about:
- Reach: Are the cables from the motor and handlebars long enough to reach the controller without being pulled taut?
- Weather: Can you shield it from the worst of the rain and road spray?
- Cooling: That controller is going to get warm. It needs at least some airflow to keep from overheating, especially on long, hilly rides.
Don't be afraid to use some masking tape to temporarily stick these components in place. It helps you visualize the cable runs and final layout before you commit to drilling or permanent fasteners.
Running Wires and Making the Connections
This is where the magic happens. A tidy wiring job is what separates a great DIY e-bike from a sloppy one. Dangling wires are a snagging hazard and just look unprofessional.
Start by routing your main cables from the handlebars (display, throttle, brake sensors) and the motor toward where you mounted the controller. Use zip ties or adhesive cable guides to fasten them neatly along the frame tubes. I like to run them parallel to the bike's existing brake and shifter cables for an almost factory look.
Now for the fun part—plugging everything in. Most modern e-bike kits make this pretty simple with color-coded, keyed connectors that only fit one way.
Here’s the typical order of operations:
- Motor Phase Wires: Connect the three thick wires from the motor to the controller.
- Hall Sensor Connector: Plug in the smaller, multi-pin connector. This is what tells the controller how the motor is spinning so it can run smoothly.
- Handlebar Controls: Connect your display, throttle, and e-brake sensors.
- Pedal Assist Sensor (PAS): This involves mounting the magnet ring on your crank spindle and the sensor on the bottom bracket shell. They need to be close enough to register your pedaling.
- Battery Connector: This is the big one. IMPORTANT: Always, always, always connect the battery as the very last step. This prevents any chance of accidentally shorting out a component while you're working.
When you make a connection, listen for that satisfying "click" to know it's fully seated. If you have any wires you need to splice yourself, skip the electrical tape. Using heat shrink tubing over your soldered joints creates a seal that's a million times more durable and water-resistant. It’s a small extra step that can save you from a massive headache down the road.
Testing and Fine-Tuning Your New Build
You’ve done it. The bike is built, the last bolt is tightened, and you’re itching to hit the road. I get it. But before you go flying down the street, we need to go through a careful shakedown process. This is the part that separates a pile of parts from a truly dialed-in, reliable e-bike. Skipping this can cost you a fried controller or worse, a nasty surprise on your first ride.
Think of this as your pre-flight check. Before that battery even gets close to its mount, give every single connection one last look. Are the Anderson plugs fully seated? Are all the motor phase wires snug? Did you torque the axle nuts to spec? A few minutes here will save you hours of headaches later.
The First Power-Up
Alright, this is the moment of truth. Get the bike up on a stand so the wheels can spin freely off the ground. Now, grab your battery. When you connect it, do it with a single, confident push. You’ll probably see a small spark—that’s normal, just the capacitors in the controller charging up. Don't flinch.
Now, take a breath and power on your display.
If that screen comes to life, you’ve just cleared the first major hurdle. It means your basic wiring is correct and power is flowing where it should. But we’re not out of the woods yet. We need to check that everything is talking to each other correctly.
Here’s the sequence I always follow for a first systems check:
- Throttle Check: Give the throttle a very gentle twist. The motor should spin up smoothly, without any weird stuttering.
- Pedal Assist (PAS) Check: Now, slowly turn the pedals forward. After a half-turn or so, the motor should kick in.
- Brake Cut-Offs: This one is a non-negotiable safety feature. While the motor is spinning (using either throttle or PAS), squeeze each brake lever, one at a time. The motor must cut out instantly. If it doesn't, stop immediately and fix it.
- Display Functions: Click through your assist levels on the display. You should see and hear the motor speed change accordingly.
This initial "wheels up" test is your best friend. It lets you confirm every input—braking, pedaling, throttle—gets the right reaction from the motor without putting any real load on the system. It’s the safest possible way to find a wiring mistake.
Customizing the Controller's Brain
With the basics working, it’s time for the fun part: programming your controller. This is where you get to shape the personality of your bike. Most modern e-bike kits have a settings menu (often called the P-settings) accessible through the display that lets you fine-tune how the bike behaves.
Here are the key settings I always dial in:
- Top Speed Limit: Be a good citizen. Set this to match your local e-bike laws.
- Power Levels: Adjust the power output for each assist level. I like to set level 1 as a gentle "eco" mode for cruising and the highest level for tackling steep hills.
- Throttle Response: Do you want instant power or a smoother, more gradual ramp-up? You can often tweak this for a more natural feel.
- PAS Sensitivity: This setting controls how quickly the motor engages when you start pedaling. A more sensitive setting provides power almost instantly.
My advice? Start with very conservative settings. For your first test ride, find a big, empty parking lot or a quiet side street. Keep it slow and feel how the power comes on and how the brakes handle the extra weight. As you get comfortable, you can start bumping up the power and tweaking the settings until it feels like an extension of you.
Troubleshooting Those First-Ride Gremlins
Even the most careful builder can run into a snag. Don’t get discouraged; most problems are surprisingly simple.
For instance, if the motor stutters or feels jerky, it’s almost always a loose connection on one of the three thick phase wires or the smaller hall sensor plug. If your display is totally dead, the first thing to check is the battery connection itself, followed by any inline fuses in your wiring harness.
This is where a cheap multimeter becomes your most valuable tool. You can use it to confirm you're getting the full 48V or 52V from your battery and trace where the power stops. By methodically checking the flow of electricity from the battery to the controller and then to the motor, you can pinpoint nearly any electrical issue. Taking your time to get everything just right is what makes a custom build so rewarding—it's not just powerful, it's your perfect ride.
So, you’ve built your e-bike, and that first ride was pure magic. Awesome. But turning that initial thrill into years of reliable fun means tackling two things that happen after the build: getting a handle on your local laws and locking in a solid maintenance routine.
Getting this right ensures your custom ride is safe, legal, and ready for the long haul.
Are You Street Legal? E-Bike Laws Explained
Navigating e-bike regulations can feel like a maze, but it usually comes down to a simple classification system. Most places in the U.S., for instance, use three main classes to define what an e-bike is and, more importantly, where you can ride it.
- Class 1: This is a pedal-assist-only bike. The motor only kicks in when you pedal, and it cuts out at 20 mph.
- Class 2: These bikes have a throttle. You can get a boost without pedaling, but the motor assist still stops at 20 mph.
- Class 3: Back to pedal-assist only, but with a higher speed cap. The motor will help you all the way up to 28 mph. Riders often need to be at least 16.
Figuring out which class your build falls into is a huge deal. A powerful, throttle-on-demand beast you built for trails might be restricted to road use only, while a simple pedal-assist commuter can often go on bike paths.
Don't Guess—Know Your Local Rules
The e-bike scene is exploding. The global market is expected to rocket from USD 36.4 billion to USD 121.4 billion by 2034, and countries like China, Germany, and the U.S. are responsible for 80% of that boom. You can see more on this global shift at market.us.
With that kind of growth, rules are trying to keep up. In Europe, for example, most e-bikes are limited to pedal-assist with a 25 km/h cutoff. Here in the States, it’s a patchwork of state and city rules.
Don't assume anything. The best thing you can do is fire up a search engine and type in "[Your State] ebike laws." Knowing the specific regulations will keep you out of trouble and avoid fines or, even worse, having your bike confiscated.
A Simple Maintenance Plan for a Long-Lasting Ride
You wouldn't drive a car for years without changing the oil, right? Your custom e-bike needs the same kind of love. A consistent maintenance schedule keeps it running like a dream and lets you spot small issues before they become wallet-draining disasters.
The battery is your top priority. Honestly, good charging habits are everything. Try to avoid running it completely dead or, on the flip side, leaving it plugged in for days. If you’re storing the bike for a while, aim for a 40-60% charge—it’s the sweet spot for battery health. To really dive deep, check out our guide on how long ebike batteries last.
A well-maintained ebike is a safe ebike. I make it a habit to do a quick pre-ride check every single time—a quick brake lever squeeze, a visual on the tires, and a listen for any weird chain noise. It takes 30 seconds and has saved me from serious trouble more than once.
Beyond the battery, here’s a simple checklist to run through regularly:
- Check Your Connections: Once a month, give all the electrical connectors a gentle wiggle. Make sure everything is snug and look for any corrosion or frayed wires, especially around the motor and controller.
- Watch Your Brakes: E-bikes are heavy and fast, which means they chew through brake pads way quicker than a regular bike. Eyeball your pads every few weeks to check for wear.
- Care for the Drivetrain: The motor puts a ton of extra torque on your chain and cassette. Keep that chain clean and lubed to ensure smooth shifting and prevent it from wearing out prematurely.
By respecting the rules of the road and giving your bike a little TLC, the amazing machine you built will be your reliable, fun-loving companion for thousands of miles to come.
At eBike Gang, we're passionate about empowering riders with high-performance electric bikes and dirt bikes that deliver an unbeatable mix of power and value. Whether you're a seasoned enthusiast or just starting your e-moto journey, we have the perfect ride for you. Explore our full collection and find your next adventure at https://ebikegang.com.