

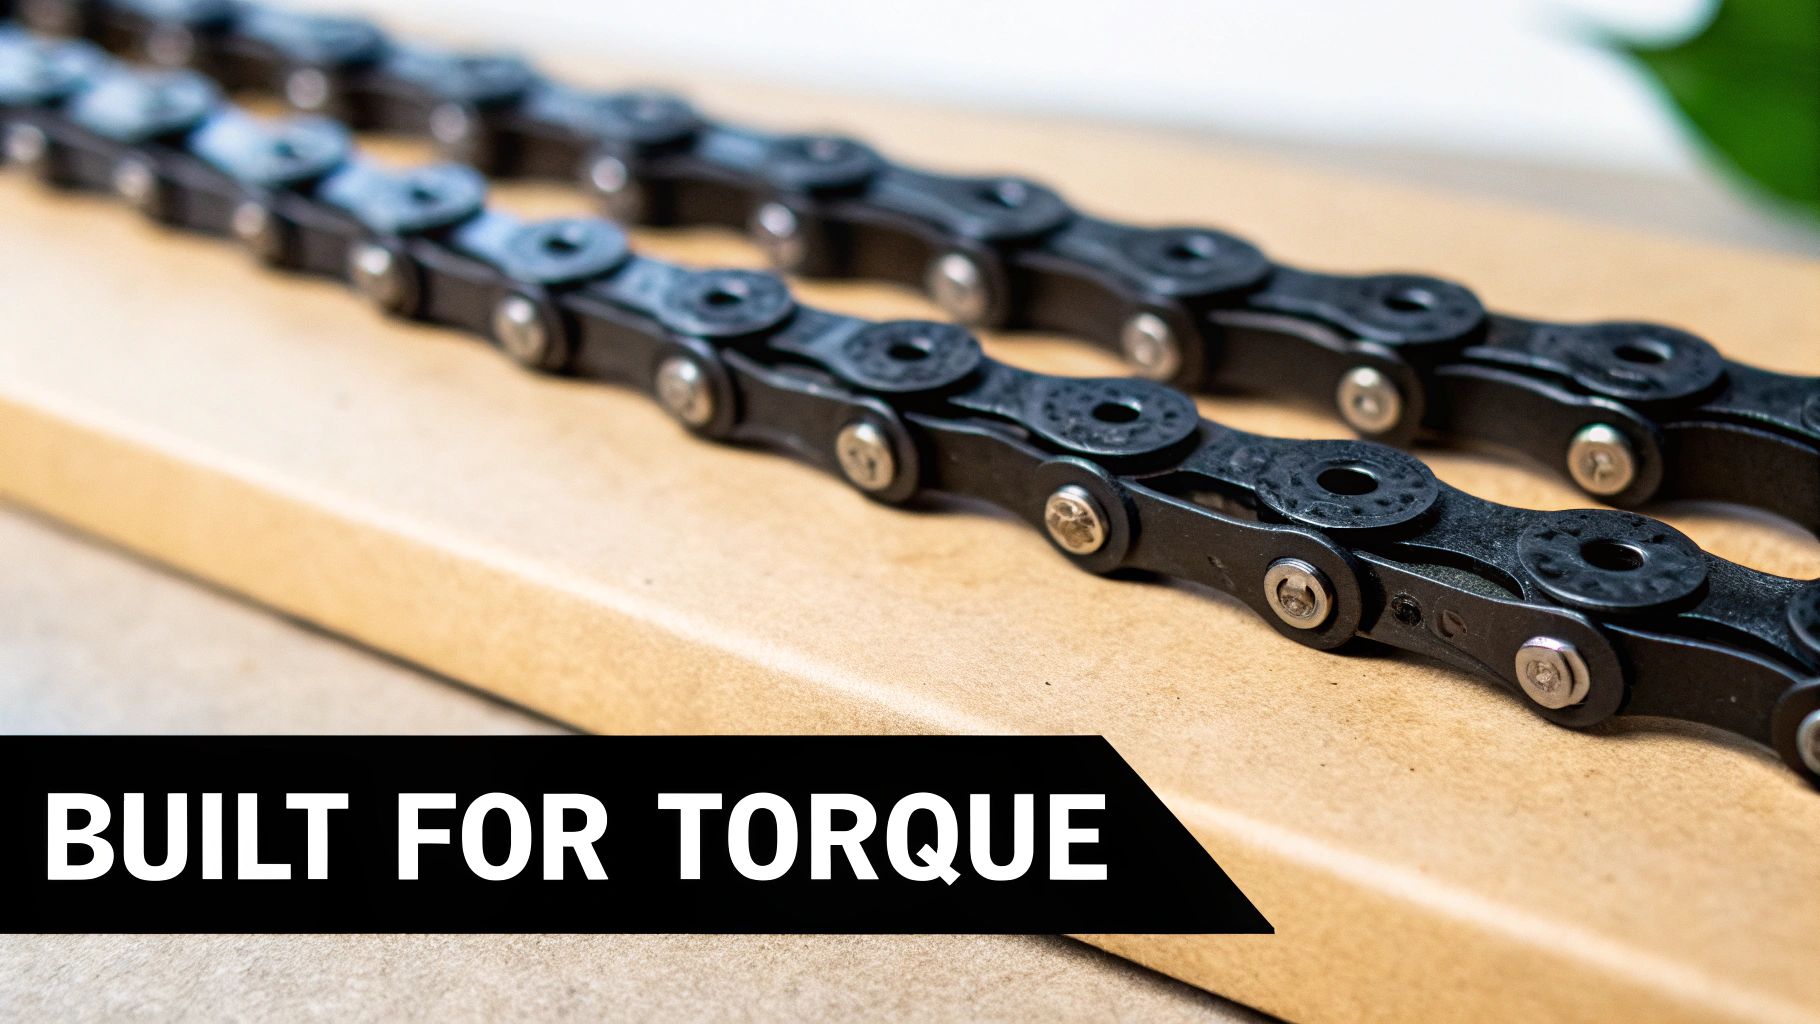
Your e-bike chain is more than just a series of links; it’s the lifeline that transfers power from both you and the motor to your rear wheel. Unlike the chain on a standard bike, an e-bike chain is specifically engineered to handle the massive and instantaneous torque an electric motor produces. It’s built with stronger materials, reinforced pins, and thicker plates to prevent it from stretching or snapping under pressure.
Think of it this way: a standard bike chain is built for a sedan, while an e-bike chain is built for a heavy-duty pickup truck. Both do a similar job, but one is designed from the ground up to manage immense force.
Understanding The Power An E-Bike Chain Must Handle
The core difference between a standard bike chain and an e-bike chain really comes down to a single word: force. When you're riding a regular bicycle, the chain only has to deal with the power you put through the pedals. That force is usually pretty gradual and predictable.
An e-bike changes the game entirely by adding the motor into the mix. The second you engage that throttle or pedal-assist, the motor delivers a powerful, immediate jolt of torque that puts a huge strain on the entire drivetrain. A standard chain just isn't built to take that kind of punishment day in and day out.
Key Distinctions In Design And Material
To handle this extra stress, manufacturers have made some serious upgrades to e-bike chains. They use hardened steel alloys and often apply special surface treatments to make them tougher and reduce friction. The whole design is simply more robust.
Here’s a quick comparison to see the differences at a glance.
Standard vs E-Bike Chain Key Differences
This table breaks down the fundamental differences between chains designed for traditional bicycles and those engineered for electric bikes.
| Feature | Standard Bike Chain | Electric Bike Chain |
|---|---|---|
| Material Strength | Standard steel alloys | Hardened, high-tensile steel alloys |
| Pin Construction | Standard riveting | Reinforced, mushroomed, or "peened" pins for higher shear strength |
| Plate Thickness | Thinner plates to save weight | Thicker inner and outer plates to resist stretching and torque |
| Surface Coating | Basic anti-corrosion treatment | Advanced coatings (e.g., nickel plating) for enhanced durability and corrosion resistance |
| Primary Stressor | Gradual human pedaling force | Instantaneous, high torque from the electric motor plus human power |
As you can see, every aspect of an e-bike chain is beefed up to cope with the extra demands.
This focus on durability is why chain drives command a massive 88.90% revenue share in the e-bike market—they're incredibly reliable when built right. This popularity continues to drive innovation in chain technology, as detailed in recent market trend reports on bicycle chain devices.
In essence, using a standard chain on an e-bike is like putting economy car tires on a high-performance sports car. It might work for a little while, but it’s completely unprepared for the power it needs to handle and is bound to fail, often taking more expensive parts with it.
Why A Specialized Chain Is Non-Negotiable
Opting for a dedicated electric bike chain isn't just about getting better performance—it's about safety and protecting your investment. A chain failure under power is seriously dangerous and can easily cause a crash.
Even before it breaks, a stretched chain will chew through your cassette and chainrings, turning a simple maintenance job into a costly full drivetrain replacement. Investing in the right chain from the start ensures your e-bike runs smoothly, safely, and efficiently for thousands of miles to come.
The Engineering Behind a Stronger E-Bike Chain
An electric bike chain isn't just a slightly beefier version of what you'd find on a standard bike. It’s a seriously engineered piece of hardware designed to handle incredible forces. Think of it like this: a regular chain is like a standard rope, but an e-bike chain is like a professional climbing rope. Both connect two points, but one is built with far superior materials and construction to handle sudden, intense loads without ever thinking of failing.
The secret sauce is in the materials and how they're made. E-bike chains are typically forged from high-grade, hardened steel alloys. This isn't your garden-variety steel; it’s heat-treated and often infused with elements like chromium to dramatically boost its hardness and stop it from stretching under the constant, powerful pull of a motor. This material choice is the first line of defense against premature wear.
Understanding Tensile Strength and Pin Power
When you start looking at the specs for an e-bike chain, you'll run into two key terms: tensile strength and pin power. They might sound a bit technical, but they have very real-world consequences for your ride.
-
Tensile Strength is all about the maximum pulling force a chain can take before it snaps. It's a measure of pure, brute strength. A higher number here means the chain is far less likely to break, even when you’re hammering the throttle up a steep hill.
-
Pin Power, also called pin retention force, measures how tightly the pins are held in the chain's outer plates. For an e-bike, this is arguably even more important. The constant side-to-side flexing during gear shifts puts a ton of stress on these tiny connections. If the pin power is weak, a plate can work its way loose, and that's when a chain fails.
To make sure those pins stay put, manufacturers use a process called peening or mushrooming. They basically flare out the end of each pin, creating a rivet-like head that locks it securely into the outer plate. It’s a small detail that makes a massive difference in the chain's overall integrity and lifespan.
Thicker Plates and Advanced Coatings
Look closely at an e-bike chain, and you'll notice the inner and outer plates are visibly thicker than on a standard chain. These beefier plates provide more material and surface area to resist the twisting and stretching that comes from a motor's instant torque. It's a straightforward but highly effective way to add durability right where it’s needed most.
On top of that, many top-tier e-bike chains feature advanced surface coatings. These aren't just for show; they play a few critical roles:
- Corrosion Resistance: A coating like nickel-plating acts as a shield against rust and corrosion, especially if you ride in wet conditions or on salted winter roads.
- Friction Reduction: Specialized low-friction coatings help the chain glide smoothly over the gears, which means better efficiency and a quieter ride.
- Hardness Increase: Some treatments, like chromizing, further harden the surface of the rollers and plates, making them even more resistant to wear.
The combination of all these engineering choices—stronger steel, peened pins, thicker plates, and protective coatings—results in a component that is fundamentally more capable of handling the unique demands of an electric drivetrain.
The industry's focus on these kinds of improvements is a big reason the global bicycle chain market was valued at around $7.43 billion in 2024 and is expected to keep growing. You can dive deeper into this market growth and the tech driving it over at The Business Research Company. For a really cool example of how these principles are applied in extreme situations, learning about the engineering of electric trail bike chains offers a fascinating look at building parts for the toughest conditions.
Ultimately, whether you're a casual weekend rider or a DIY enthusiast, the sophisticated design of an e-bike chain is a critical piece of the puzzle. If you're thinking about putting together your own ride, understanding these components is a vital step in our guide on building an electric bike. It’s what ensures your bike not only performs great but stays safe and reliable for every mile.
How to Choose the Right Electric Bike Chain
Picking out a new chain for your electric bike can feel a little overwhelming at first, but it's simpler than you think. The key is getting just two things right: making sure the chain is compatible with your gears and cutting it to the proper length.
Nail these two details, and you'll save yourself a world of frustration. Get them wrong, and you're looking at sloppy shifting, a noisy ride, and accelerated wear on your much more expensive cassette and chainring. Let's walk through how to get it right every time.
Matching the Chain to Your Drivetrain Speed
First things first, you need to match your chain to your bike's "speed." This has nothing to do with how fast you can ride. It’s all about the number of cogs—the little gears—on your rear cassette.
It's a simple one-to-one relationship. If your bike has 10 cogs in the back, you have a 10-speed drivetrain and need a 10-speed chain. Got 11 cogs? You need an 11-speed chain. You get the idea.
So, why does this matter so much? As manufacturers pack more gears onto a cassette, the space between each cog gets smaller and smaller. Chains have to be built to different widths to fit these gaps perfectly.
- An 11-speed chain is quite narrow to slot between those tightly packed cogs.
- A 10-speed chain is a bit wider.
- A single-speed chain is the widest of all, built for bikes with just one gear in the back.
Trying to use the wrong one is a recipe for disaster. If you slap a wider 9-speed chain on a 10-speed cassette, it's going to rub against the neighboring cogs, causing a ton of noise and making shifting a nightmare. On the flip side, putting a narrow 11-speed chain on a 9-speed setup will cause it to skip and jump because it can't engage the teeth properly.
Determining the Correct Chain Length
Once you've got the right speed, you need to make sure the chain is the right length. Too long, and your shifting will feel lazy and the chain might even fall off completely. Too short, and you'll put a ton of stress on your derailleur, which can lead to a very expensive failure.
The easiest and most foolproof method is to simply use your old chain as a guide.
- Start by taking the old chain off your bike.
- Lay both the old and new chains out on a flat surface, side-by-side. Make sure they're pulled straight.
- Count the links on your old chain, then use a chain tool to break the new chain at the exact same link count.
Pro Tip: Never assume a new chain is ready to go right out of the box. They're almost always sold extra long to fit a huge range of bikes, so you'll definitely need to shorten it.
If you're unsure whether you even need a new chain, this little flowchart can help you decide.
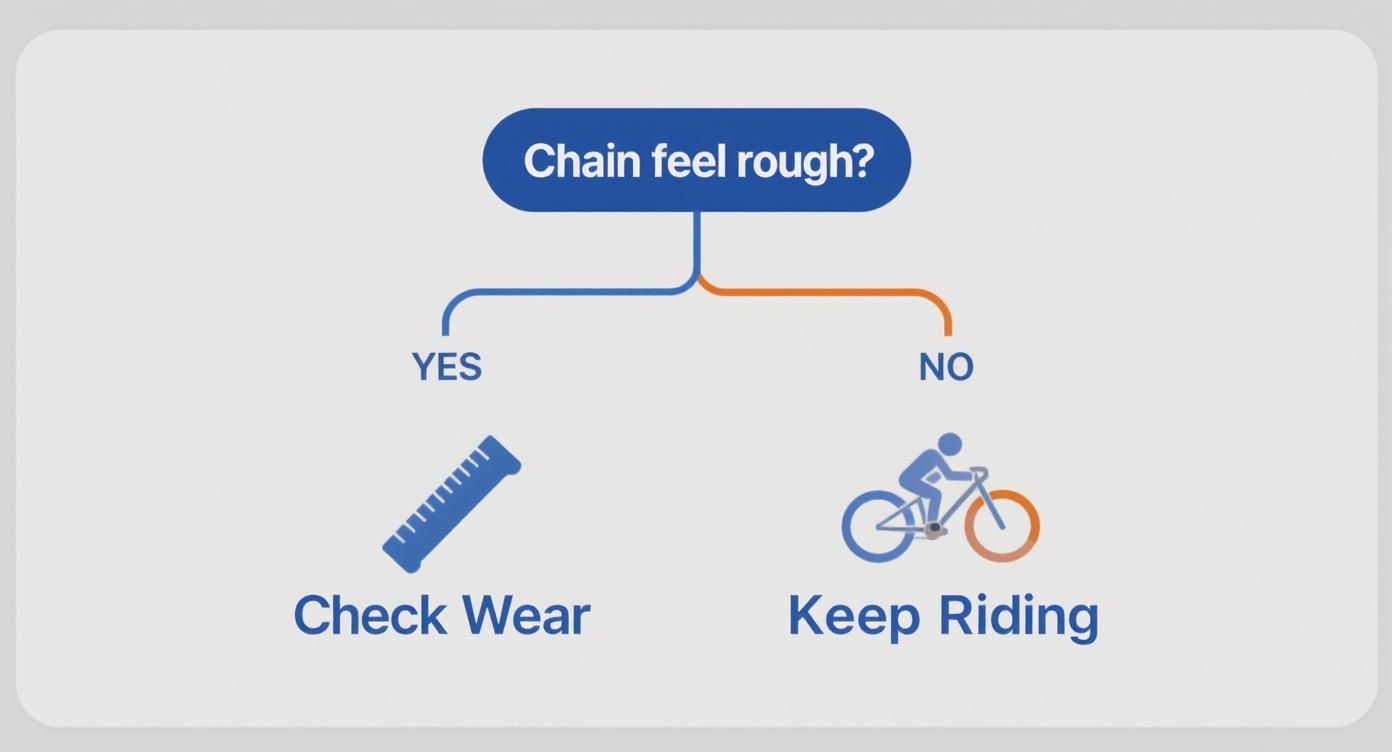
It's a great starting point—if things feel off when you're riding, grabbing a chain checker is the next logical step to protect the rest of your drivetrain.
Comparing Popular E-Bike Chain Models
With speed and length figured out, you can finally look at specific brands and models. Not all chains are created equal; some are built for daily commuting, while others are beefed up for intense trail riding. If you want to see what's out there, you can browse a wide variety of electric bike chains to find one that fits your bike and riding style.
To help you get started, here’s a quick look at a few leading options designed specifically for the demands of e-bikes.
Popular E-Bike Chain Models Compared
A comparison of leading e-bike specific chains to help you choose the best option based on your bike's drivetrain, riding style, and budget.
| Chain Model | Speeds | Key Features | Best For |
|---|---|---|---|
| KMC e10 EPT | 10-Speed | EcoProTeQ anti-rust coating, high pin power, and reinforced for mid-drive motors. | All-weather commuters and touring riders who need top-notch durability and corrosion resistance. |
| Shimano CN-HG701 | 11-Speed | SIL-TEC low-friction surface treatment on plates and rollers for smooth, long-lasting shifts. | Performance-focused road and mountain e-bike riders using Shimano drivetrains. |
| SRAM EX1 | 8-Speed | Purpose-built for high-torque e-MTBs with a wider, super-strong profile. | Aggressive e-MTB riders on SRAM’s EX1 drivetrain, where strength is the number one priority. |
Ultimately, choosing the right chain just boils down to matching it to your bike. Here at eBike Gang, we make sure our bikes, like the powerful UGBEST MB750, come equipped with chains that can handle the motor's output. If you ever need a replacement, our 12-month limited warranty covers any manufacturing defects, and you can always find the right compatible parts here on our site.
Mastering E-Bike Chain Maintenance and Lubrication
If there's one secret weapon for a quiet, long-lasting drivetrain, it’s proper chain care. An electric bike chain is under a lot of stress, but a simple, consistent maintenance routine can make all the difference, extending its life and protecting your entire investment.
Think of it this way: neglecting your chain is like never changing the oil in a high-performance car. Sooner or later, that wear and tear will lead to a very expensive breakdown.
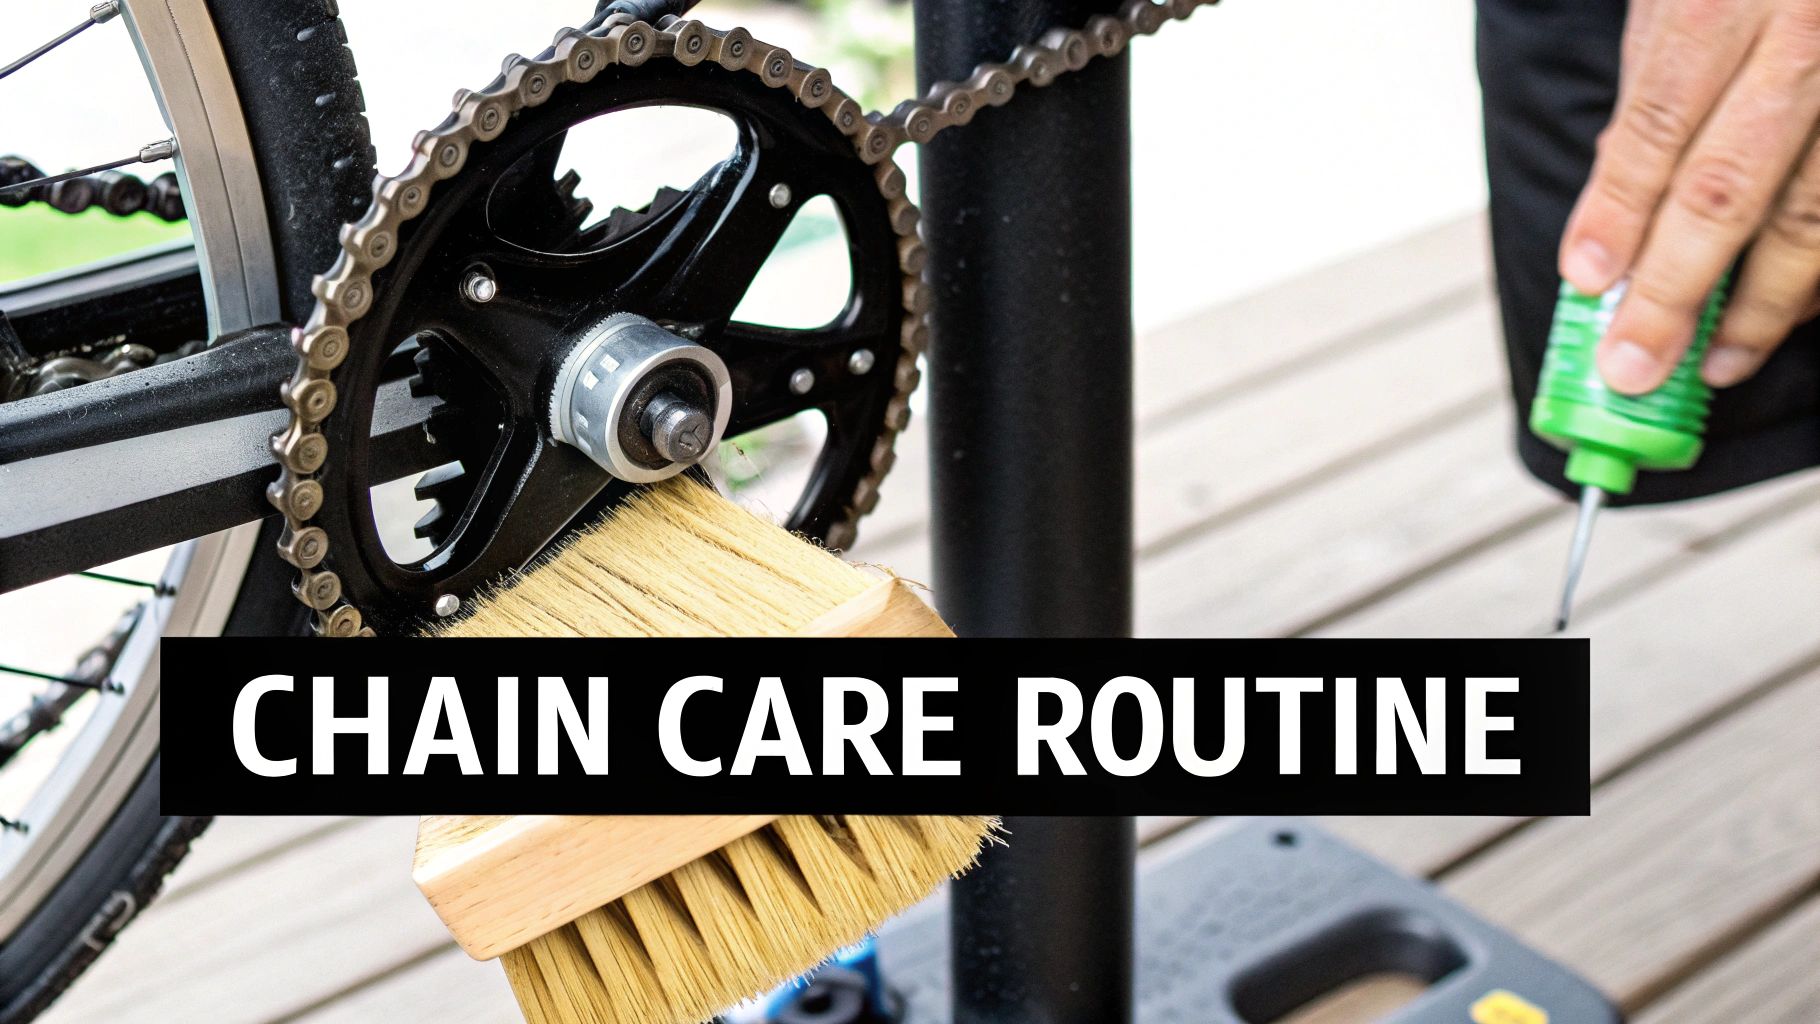
The whole game is about keeping your chain clean and properly lubricated. When a chain gets caked in grit and old lube, it turns into an abrasive paste. With every single pedal stroke, that paste grinds away at your chain, cassette, and chainrings, causing poor shifting, a noisy ride, and eventually, costly repairs. A clean chain, on the other hand, just works.
Creating Your Maintenance Schedule
When it comes to chain care, consistency beats intensity every time. You don’t need to do a deep clean after every ride, but getting into a regular rhythm of inspection and maintenance is what really counts.
Here’s a simple, effective schedule to keep you rolling smoothly:
- After Every Ride (Quick Wipe-Down): It takes less than a minute. Grab a clean, dry rag and give the chain a quick wipe. This removes the surface-level dust and grime before it can work its way inside the rollers.
- Every 100-150 Miles (Clean and Lube): This is your main event. Give the chain a more thorough cleaning and apply fresh lubricant. If you ride in wet or dusty conditions, you'll want to do this more often.
- Monthly (Wear Check): Once a month, grab a chain checker tool to measure for stretch. Honestly, this is the single most important habit for preventing expensive damage to the rest of your drivetrain.
An electric bike chain is the hardest-working part of your drivetrain. A little bit of proactive care goes a long way in preventing the kind of accelerated wear that can force a full replacement of your cassette and chainrings.
Choosing the Right Lubricant
Walking into a bike shop and seeing a wall of chain lubes can be intimidating, but they really boil down to three main types. Picking the right one for where you ride is key.
- Dry Lube: This stuff is thin, goes on wet, and dries into a waxy film that doesn't attract dirt. It's perfect for dry, dusty, or sandy conditions. The downside? It washes off pretty easily in the rain, so you’ll have to reapply it more often.
- Wet Lube: This is a much thicker, oil-based lubricant that’s built to resist water. It's the go-to choice for riding in wet, muddy, or sloppy winter conditions. Its sticky nature means it can attract a lot of gunk in dry weather, so you'll need to clean the chain more frequently.
- Ceramic Lube: The premium option. Tiny ceramic particles are suspended in a liquid, and once applied, they bond to the metal to create an incredibly smooth, durable, low-friction surface. It's fantastic for all conditions but usually comes with a higher price tag.
The Importance of a Chain Checker Tool
If you only buy one specialty tool for your e-bike, make it a chain checker. This simple little gadget is designed to accurately measure chain "stretch," which is really just the wear on the pins and rollers.
By catching wear early—at the 0.5% or 0.75% mark—you can replace just the chain before it starts to chew up the expensive teeth on your cassette and chainring. For more great ideas on essential gear, check out our guide to the best electric bike accessories.
The e-bike industry is exploding, with a global market valued at about $61.89 billion in 2024 and projected to climb to nearly $70 billion by 2025. This growth, which you can read about in detailed e-bike market growth forecasts, is fueling incredible innovation. As bikes get more powerful and sophisticated, taking proper care of critical parts like your chain is the key to a great ownership experience.
When to Replace Your E-Bike Chain
https://www.youtube.com/embed/gXd-3UnqoaM
Knowing when to swap out your electric bike chain is probably one of the most critical maintenance skills you can pick up. If you wait too long, it becomes a seriously expensive mistake. A worn, stretched chain acts like sandpaper, grinding away at your cassette and chainring—turning a simple, affordable fix into a full drivetrain replacement.
Think of your chain and gears working together like a zipper. When everything's new, the teeth mesh perfectly. But as the chain wears, it’s like stretching one side of that zipper. It just doesn't line up anymore, and every pedal stroke starts chewing up the teeth on the other side. The goal is to replace that worn side before it wrecks the whole system.
Listening to Your Bike for Early Warnings
Often, your e-bike will start giving you little hints that its chain is on its way out. These audible and physical clues aren't as precise as using a proper tool, but they are clear signs that you need to take a closer look. Catching these symptoms early can save you a much bigger headache later.
You should definitely inspect your chain if you notice any of these signs:
- Sloppy or Delayed Shifting: Does your bike hesitate or clunk when you shift gears? That's often a worn chain struggling to find its place on the next cog.
- Chain Skipping Under Power: This one is a more serious symptom. When you really put the power down—like climbing a steep hill or accelerating from a standstill—a stretched chain can literally jump over the gear teeth. It feels like a sudden, jarring lurch and is a major red flag.
- Increased Drivetrain Noise: A happy drivetrain runs pretty quietly. If you start hearing new grinding, clicking, or rattling noises, it’s often the sound of a worn chain fitting poorly against the cogs.
The Definitive Method: Using a Chain Wear Tool
While listening to your bike is a great habit, the only way to be certain is to measure the chain for "stretch." This doesn't mean the metal itself is stretching. Instead, it refers to the tiny bits of wear that add up across the hundreds of pins and rollers that make up your chain.
The best and easiest way to do this is with a simple, inexpensive chain wear indicator tool. This little gadget takes all the guesswork out of the process, giving you a clear, objective measurement.
A chain wear tool is the single most valuable tool for an e-bike owner. It prevents you from replacing a chain too early (wasting money) or too late (costing you a new cassette and chainring).
Most of these tools have two sides or markers: 0.5% and 0.75%. Here’s how to read them:
- At 0.5% wear, it’s time to start planning your chain replacement. For modern 11- and 12-speed systems, this is the non-negotiable point to replace it to protect your cassette.
- At 0.75% wear, the chain needs to be replaced immediately, no matter what system you have (7, 8, 9, or 10-speed). Pushing past this point dramatically speeds up the wear on your other, more expensive components.
Basic Replacement Checklist
Changing your own e-bike chain is a totally manageable job if you have the right tools. If you're going to tackle it yourself, you’ll want to have a few key things on hand. And if not, this list will at least help you have a more informed chat with your local bike mechanic.
For specific guidance related to your eBike Gang model, always check our official user manuals for detailed specifications.
Essential Tools & Parts:
- A new e-bike chain: Make sure it's compatible and matched to your drivetrain's speed (e.g., 9-speed, 10-speed).
- A chain breaker tool: You'll need this to remove the old chain and get the new one to the right length.
- A new master link: This usually comes in the box with your new chain.
- Chain lube: The new chain will need a good coat of lube after installation.
Tackling Common E-Bike Chain Problems
Even a perfectly maintained e-bike chain will act up from time to time. When you start hearing frustrating clicks, or the chain starts skipping or dropping, it’s rarely a sign of total failure. Think of it as your bike's way of telling you a small adjustment is needed.
These issues are like clues in a detective story. A skipping chain isn't just an annoyance—it's a symptom pointing to a few likely culprits. Once you learn to read the signs, you can quickly figure out what's wrong and get back to enjoying a smooth, quiet ride.
Let's walk through how to diagnose and fix the most common e-bike chain problems.
What to Do When Your Chain Skips
A skipping chain is probably the most common—and jarring—issue you'll encounter. It usually happens right when you put the most power down, like when you’re accelerating from a stop or grinding up a steep hill. You'll feel a sudden lurch as the chain feels like it's slipping over the gear teeth.
Nine times out of ten, this problem points to one of two things:
- A Worn-Out Drivetrain: If your chain is stretched past the 0.75% wear mark, its rollers no longer sit nicely in the valleys of your cassette teeth. Under pressure, the chain will try to climb right over the top of the cog.
- A Misadjusted Derailleur: Your rear derailleur might just be a hair out of alignment. If it isn't perfectly centered over the gear you're in, it can't guide the chain properly, leading to skips under load.
A quick check with a chain wear tool will tell you instantly if wear is the issue. If the chain itself is still in good shape, then a simple derailleur tune-up is almost certainly the fix.
Why Does My Chain Keep Dropping?
A chain that constantly falls off the front chainring or the cassette isn’t just annoying, it can be a real safety hazard. When this happens, it’s usually because something is physically pushing or pulling the chain off course.
Here’s what to look for:
- Check the Derailleur Hanger: This is the small metal tab your rear derailleur hangs from. It’s designed to be a weak link—it bends or breaks in a crash to save your expensive frame. But even a minor bump can bend it slightly, throwing your entire shifting alignment out of whack and causing the chain to drop.
- Inspect Your Limit Screws: Your derailleur has two tiny screws, usually marked 'H' and 'L'. These act as physical walls, stopping the derailleur from moving the chain too far inward (into the spokes) or too far outward (off the smallest cog). If they aren't set correctly, it's an open invitation for the chain to fall off.
A bent derailleur hanger is the silent killer of good shifting. It’s one of the most overlooked causes of persistent chain problems, so always check it first.
Getting Rid of Clicks and Grinding Noises
Few things can ruin a peaceful ride like a mysterious clicking or grinding sound coming from your drivetrain. These noises are almost always caused by a single point of friction or a link that isn't playing nice with the rest of the chain.
The usual suspect is a stiff link. This happens when one of the chain's pivot points gets gummed up or tight, so it doesn't bend as freely as the others. You’ll hear a distinct "click" every single time that specific link goes through the derailleur pulleys.
Finding it is easy. Just slowly pedal the bike backward and watch the chain as it wraps around the small derailleur pulleys. You'll see the stiff link refuse to bend smoothly. Once you spot it, grab the chain on either side of the sticky link and gently flex it side-to-side with your hands. That little bit of movement is usually enough to free it up.
If you've tried everything and suspect you need a new chain, don't worry. All eBike Gang products are backed by our 12-month limited warranty, and our support team is always ready to help you find the right part.
Got Questions About Your E-Bike Chain? We've Got Answers.
Even after you’ve gotten the hang of the basics, a few specific questions always seem to pop up. Let's tackle some of the most common ones so you can feel confident about keeping your bike running smoothly.
Can I Just Slap a Regular Bike Chain on My E-Bike?
You could, but you absolutely shouldn't. While a standard chain might technically fit onto the sprockets, it's just not built for the job.
Think of it this way: your e-bike motor delivers a powerful, instant punch of torque that a regular chain simply isn't designed to handle. Using one is a recipe for disaster—it'll stretch out incredibly fast, chew up your expensive cassette and chainring, and significantly increase the risk of the electric bike chain snapping mid-ride. Trust us, that's a dangerous situation you want to avoid. Always, always stick with a chain specifically rated for e-bikes.
A standard chain on an e-bike is a ticking clock. It's not a matter of if it will fail, but when—and it will likely take more expensive parts down with it.
So, How Often Do I Need to Replace It?
There’s no magic number here. How long your chain lasts really comes down to how you ride, the weather you ride in, your motor's power, and how well you take care of it.
The best way to know for sure is to get a chain wear indicator tool and check it regularly. For most e-bikes, you’ll want to replace the chain once it hits 0.5% to 0.75% stretch. Catching it at this point saves the rest of your drivetrain from premature wear. This could be as soon as 500 miles for a hard-ridden bike or well over 1,500 miles for a gently used one.
What’s the Big Deal If I Don’t Replace a Worn Chain?
Riding on a worn-out, "stretched" chain is a surefire way to wreck your drivetrain. As the chain elongates, it no longer sits properly in the grooves of your cassette and chainring teeth.
This poor fit creates friction that grinds down those much more expensive components, eventually turning the teeth into a "shark-fin" shape. You'll start to notice sloppy shifting, and then the chain will begin to skip dangerously under power. If you let it go for too long, you’re not just looking at a chain replacement anymore; you'll have to replace the entire drivetrain—chain, cassette, and chainring. That's a much bigger and more expensive headache.
At eBike Gang, we make sure every bike we sell comes with a tough, properly matched electric bike chain from day one. When it's time for a replacement or if you just have questions about keeping things running right, our parts store and customer support team are always here to help. Check out our lineup of high-performance e-bikes and gear over at https://ebikegang.com.