

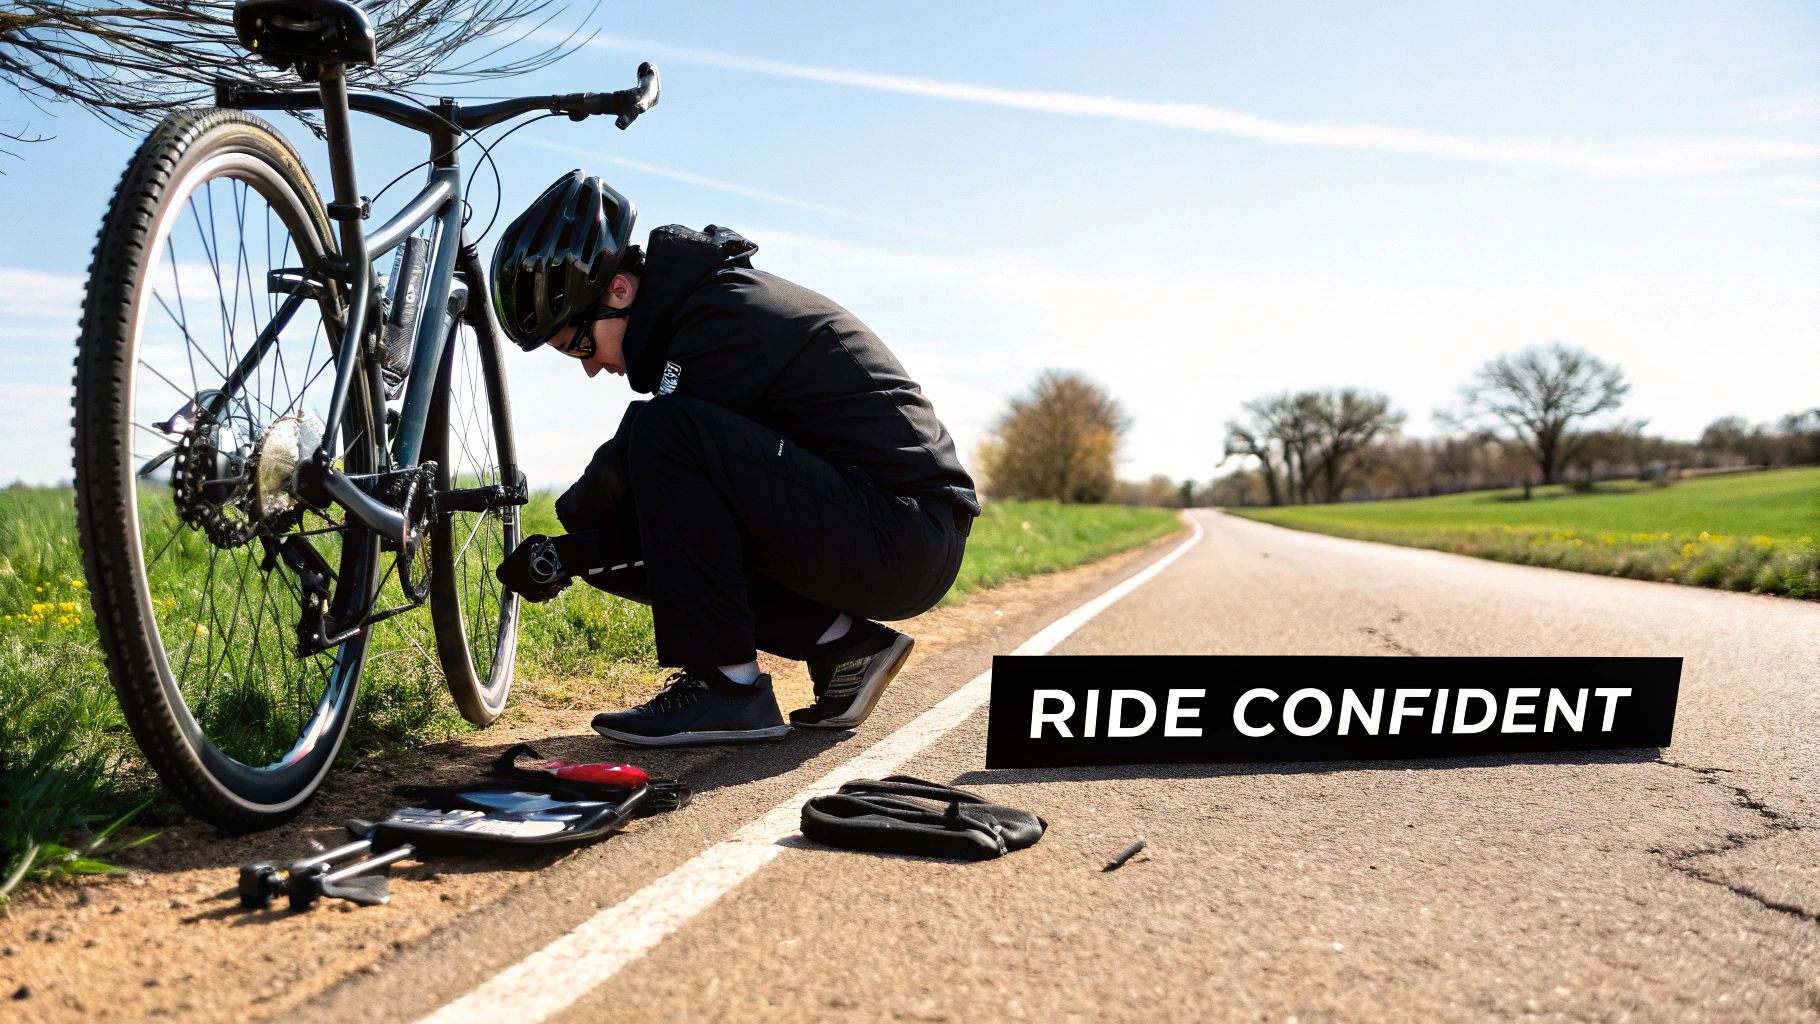
A good bike repair kit is what separates a minor five-minute fix from a ride-ending disaster. It's more than just a pouch of tools; it’s the confidence to push a little further down that trail, knowing you can handle what the ride throws at you. Forget waiting for a rescue—being prepared is the best piece of gear you can carry.
Your Ticket to Uninterrupted Adventure
We’ve all been there. That sinking feeling when you hear the unmistakable hiss of a flat tire or the jarring clank of a dropped chain, miles from home. That's exactly the moment we're trying to prevent. A reliable bike repair kit isn’t an optional accessory; it's a non-negotiable part of every single ride.
It doesn’t matter if you're cruising on a UGBEST MB750 or tackling singletrack with an eBike Gang VETRA BLAZER. A flat tire is still a flat tire. But with the right tools and a bit of practice, these mishaps become minor speed bumps instead of full-blown crises.
From Annoyance to Empowerment
Think of your repair kit like insurance. You hope you never have to use it, but you're incredibly glad it's there when you do. Carrying these tools completely changes your mindset, shifting you from worrying about what could go wrong to feeling confident you can handle it. That's empowering.
This push for self-reliance is why so many cyclists are building their own toolkits. The mountain bike repair kit market alone was valued at USD 478.50 million and is expected to hit USD 865.30 million by 2032. It’s a clear sign of cycling's growing popularity, especially here in North America, which holds a massive 38.4% market share. You can read more about the growth of the bike repair market.
Having a dependable bike repair kit means you're never truly stranded. It's the difference between a five-minute fix and a five-mile walk home.
At the end of the day, it’s all about maximizing your saddle time and minimizing your downtime. A simple, fixable mechanical shouldn’t be what cuts your adventure short. Being prepared lets you focus on the good stuff: the views, the workout, and the simple joy of the ride.
Building Your Perfect Trailside Toolkit
Deciding to carry a repair kit is easy. The real confidence comes from knowing exactly what’s in it and why. A good toolkit isn't just a random pile of tools; it’s a carefully selected system designed to get you out of the most common jams you'll face on a ride. Let's forget about just throwing stuff in a bag and instead think about the problems you need to solve.
This problem-first approach means you carry what you need, and nothing you don't. While it's a different world, even looking at general advice, like these insights into building an essential care kit for a car, reinforces the same principle: prepare for the most likely failures.
Handling Tire Troubles
Sooner or later, you're going to get a flat. It’s the most common mechanical issue out there, so your tire repair game needs to be on point. You want options, because the trail doesn't always serve up simple, clean punctures.
- Tire Levers: These are absolutely non-negotiable for getting a stubborn tire off the rim. Stick with a good, strong set of plastic levers. It’s tempting to grab metal ones for toughness, but they can easily scratch or gouge your expensive rims.
- Inflation Method: You’ve got two main routes here: a mini-pump or a CO2 inflator. A mini-pump is old-school reliable—it’ll never run out of air, but you have to provide the muscle. CO2 is incredibly fast but the cartridges are one-and-done. Honestly, a lot of experienced riders carry both. For more on this, our guide on choosing a portable air pump for bikes is a great resource.
- Patches or Plugs: If you're running traditional inner tubes, a simple patch kit is a featherlight and effective backup. For tubeless riders, a tubeless plug kit (often called a "bacon strip" kit) is a must-have for sealing up bigger gashes that your sealant just can’t handle.
Conquering Chain Catastrophes
Nothing stops a ride dead in its tracks like a broken chain. It sounds catastrophic, but it’s a surprisingly quick fix if you have the right couple of items. All you need is a way to remove the busted link and a way to put the chain back together.
First, your multi-tool absolutely must have a chain breaker (or chain tool). This little gadget gives you the leverage to push the pin out of a damaged link. To reconnect everything, you'll need a quick-link (sometimes called a master link). Make sure it matches your chain's speed (e.g., 10, 11, or 12-speed). This clever two-piece link just snaps into place, getting you rolling again without the headache of trying to press an old pin back in.
Making Critical Adjustments
Beyond flats and broken chains, sometimes things just work themselves loose. This is where a quality multi-tool really becomes the heart of your entire kit. It’s your all-in-one wrench set for tightening bolts and tweaking components.
A solid multi-tool isn't just a nice-to-have; it's a genuine ride-saver. In some mountain biking events, bike breakdowns historically account for 25% of trail abandonments. This stat alone shows why a good multi-tool is essential for anyone on a powerful bike like the UGBK2.
When you’re picking one out, don't skimp. Look for a tool with a solid selection of bits. You'll want a full range of Allen (hex) keys from 2mm up to 8mm. Just as important is a T25 Torx bit; that star-shaped bit is the standard for disc brake rotor bolts, so you'll be stuck without it on most modern bikes. With these in hand, you can adjust your handlebars, tweak your seat height, and tighten brake levers or derailleurs right there on the trail, making sure your ride home is a safe one.
Mastering Common Roadside and Trail Repairs
Having a bike repair kit is one thing, but knowing how to use it when you're miles from home is what really counts. This is where you get your hands dirty and turn a ride-ending problem into a minor inconvenience. Forget fumbling with your phone trying to find a YouTube tutorial on a dusty trail—let's walk through the most common fixes you'll face.
The idea isn't to become a pro mechanic overnight. It’s about being able to handle the 90% of common issues that a few simple tools can solve. A puncture on a quiet country lane or a loose bolt on a rocky descent—these skills are your ticket to self-sufficiency.
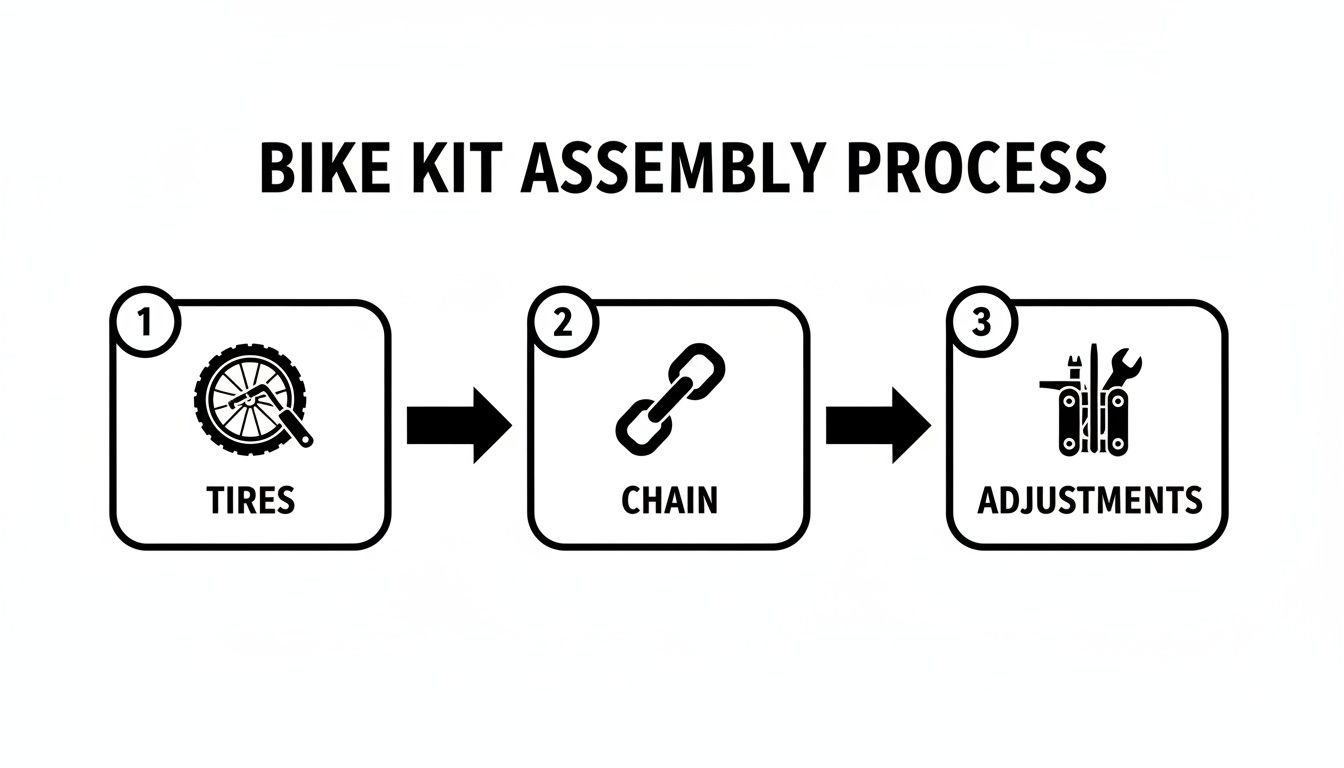
As you can see, being prepared boils down to three key areas: tires, chains, and general adjustments. These are, by far, the most frequent culprits that will try to ruin your ride.
Tackling the Inevitable Flat Tire
That sudden hiss of a flat tire is a sound every cyclist dreads. But don't panic. Fixing a flat is a rite of passage and, with a little practice, a surprisingly quick job.
First, get the wheel off the bike. A little pro-tip for the rear wheel: shift your chain to the smallest cog on the cassette before you do anything else. This creates more slack in the chain and makes wrestling the wheel out a whole lot easier.
Now, grab your tire levers. Work the tip of one lever under the tire's edge (the bead) and pry it up over the rim's wall. Hook that lever onto a spoke to hold it in place. Then, take your second lever and work your way around the wheel a few inches at a time until one side of the tire is completely off the rim.
Pull the old tube out, but don't just toss it aside yet. Inflate it a little and listen for the escaping air to find the puncture. Once you've found the hole, you need to play detective. Carefully run your fingers along the inside of your tire to find whatever caused the flat—it could be a tiny shard of glass, a sharp rock, or a nasty thorn still embedded in the rubber.
Always find the cause of the flat before installing a new tube. Skipping this crucial check is the number one reason for getting a second, immediate flat tire just minutes after a repair.
Once you’re sure the tire is clear, you can either patch the old tube or, for a faster fix, grab your spare. Put just enough air into the new tube to give it some shape (this prevents it from getting twisted), then tuck it into the tire, starting with the valve stem. Finally, use the palms of your hands and your thumbs to work the tire bead back onto the rim. Only use a tire lever for that last stubborn section, and be careful not to pinch the new tube!
Demystifying an Emergency Chain Repair
A snapped chain can feel like a complete disaster, but with a chain tool and a quick-link in your kit, it's a five-minute fix. This usually happens when you're putting the chain under a lot of strain, like during a poorly timed shift on a steep climb.
First, take a look at the damage. You're looking for the mangled link—usually a plate is twisted or a pin has popped out. The goal is to remove that entire damaged section, leaving you with two clean ends to work with.
This is where your chain tool comes in. Position it on the pin of the link you need to remove and start turning the handle. You’ll feel some resistance and then a distinct "pop" as the pin starts to move. Push the pin all the way out to separate the chain. Do this for both sides of the damaged link, so you're left with two "inner link" ends.
Now, find the quick-link that matches your chain's speed (e.g., a 10-speed quick-link for a 10-speed chain). A quick-link comes in two identical halves. Just insert one half through each end of the chain, snap them together, and pull the chain taut. You can do this by hand, or simply by stepping on the pedal. You'll hear a satisfying click as it locks securely in place.
The Art of the Quick Adjustment
Sometimes, the issue isn't a broken part, but just something that's rattled loose. That annoying buzz, a wobbly component, or a creak can often be silenced by tightening a single bolt. Your multi-tool is the hero of these situations.
Before you start turning screws, figure out where the noise or wobble is coming from.
- Loose Handlebars or Stem? If your handlebars feel like they can twist independently of the front wheel, chances are the bolts on your stem are loose. Use the right-sized Allen key from your multi-tool to snug them up evenly.
- Wobbly Seat Post? If your saddle keeps slipping down or twisting from side to side, the seat post clamp bolt just needs a quick turn to secure it.
For these on-the-fly fixes, just aim for "snug tight." You don't need to put all your muscle into it; you just need to make it secure enough to get you home safely, where you can use a proper torque wrench if needed.
E-Bike Specific Tools and Considerations
Let's be clear: your e-bike is a different beast than a standard bicycle. It’s heavier and more powerful, and all that extra oomph puts unique stress on its parts. That means your old repair kit needs some e-bike-specific upgrades to be truly useful out on the road or trail. The torque from a bike like the VETRA BLAZER isn't messing around—it tests every single component, from the tires to the chain.
The most common place you'll feel this difference is with the wheels and tires. E-bike tires are built tough to handle the extra weight and speed. That's great for durability, but it can make them a real bear to get off the rim with flimsy, basic tire levers.
Upgrading Your Tire and Wheel Tools
To save yourself a world of frustration, the first thing you should do is get a set of beefier, more durable tire levers. I'm talking about levers made from reinforced polymer or metal ones with a plastic coating to protect your rims. They give you the leverage you need to pop a stubborn tire bead without snapping in your hand.
You'll also run into a big difference with how the wheels are attached. Many e-bikes, especially those with hub motors, use large nuts instead of the simple quick-release skewers you might be used to. Your average multi-tool just isn't going to have what you need.
- Proper Wrenches: You absolutely need to add the right size wrench to your kit. It's often a 15mm, 18mm, or even 19mm, so check your bike and get the exact one.
- Torque Arm Smarts: Pay close attention to how any torque arms or anti-rotation washers are oriented before you start loosening things. Taking a quick photo with your phone can be a lifesaver during reassembly.
If you want to get into the nitty-gritty, our guide to e-bike tire repair covers all of this in much more detail.
Electrical and Drivetrain Necessities
Now, I'm not suggesting you perform open-heart surgery on your e-bike’s electronics in the middle of nowhere. But a couple of simple additions can make a huge difference. A small multi-tool that includes a Phillips head screwdriver is perfect for tightening a rattling light or a loose display mount.
Here's a non-negotiable safety rule: always power down the entire system—and remove the battery if you can—before you work on any part of your e-bike. This simple step prevents the motor from kicking on unexpectedly and protects the electronics from a costly short circuit.
The powerful motor also puts a ton of strain on your chain. That's why I always recommend carrying a robust chain tool and a couple of spare quick-links made specifically for e-bike chains. These chains are built to be stronger, and a cheap, flimsy tool might just break before the chain pin does. Being ready for a quick chain fix can be the difference between a minor inconvenience and a very long, heavy walk home.
How to Pack and Maintain Your Repair Kit
It doesn't matter how great your bike repair kit is if it's sitting in your garage, a jumbled mess, or full of rusty tools. The real key to confidence out on a ride isn't just owning the tools—it's knowing how to pack and care for them so they actually work when you need them most.
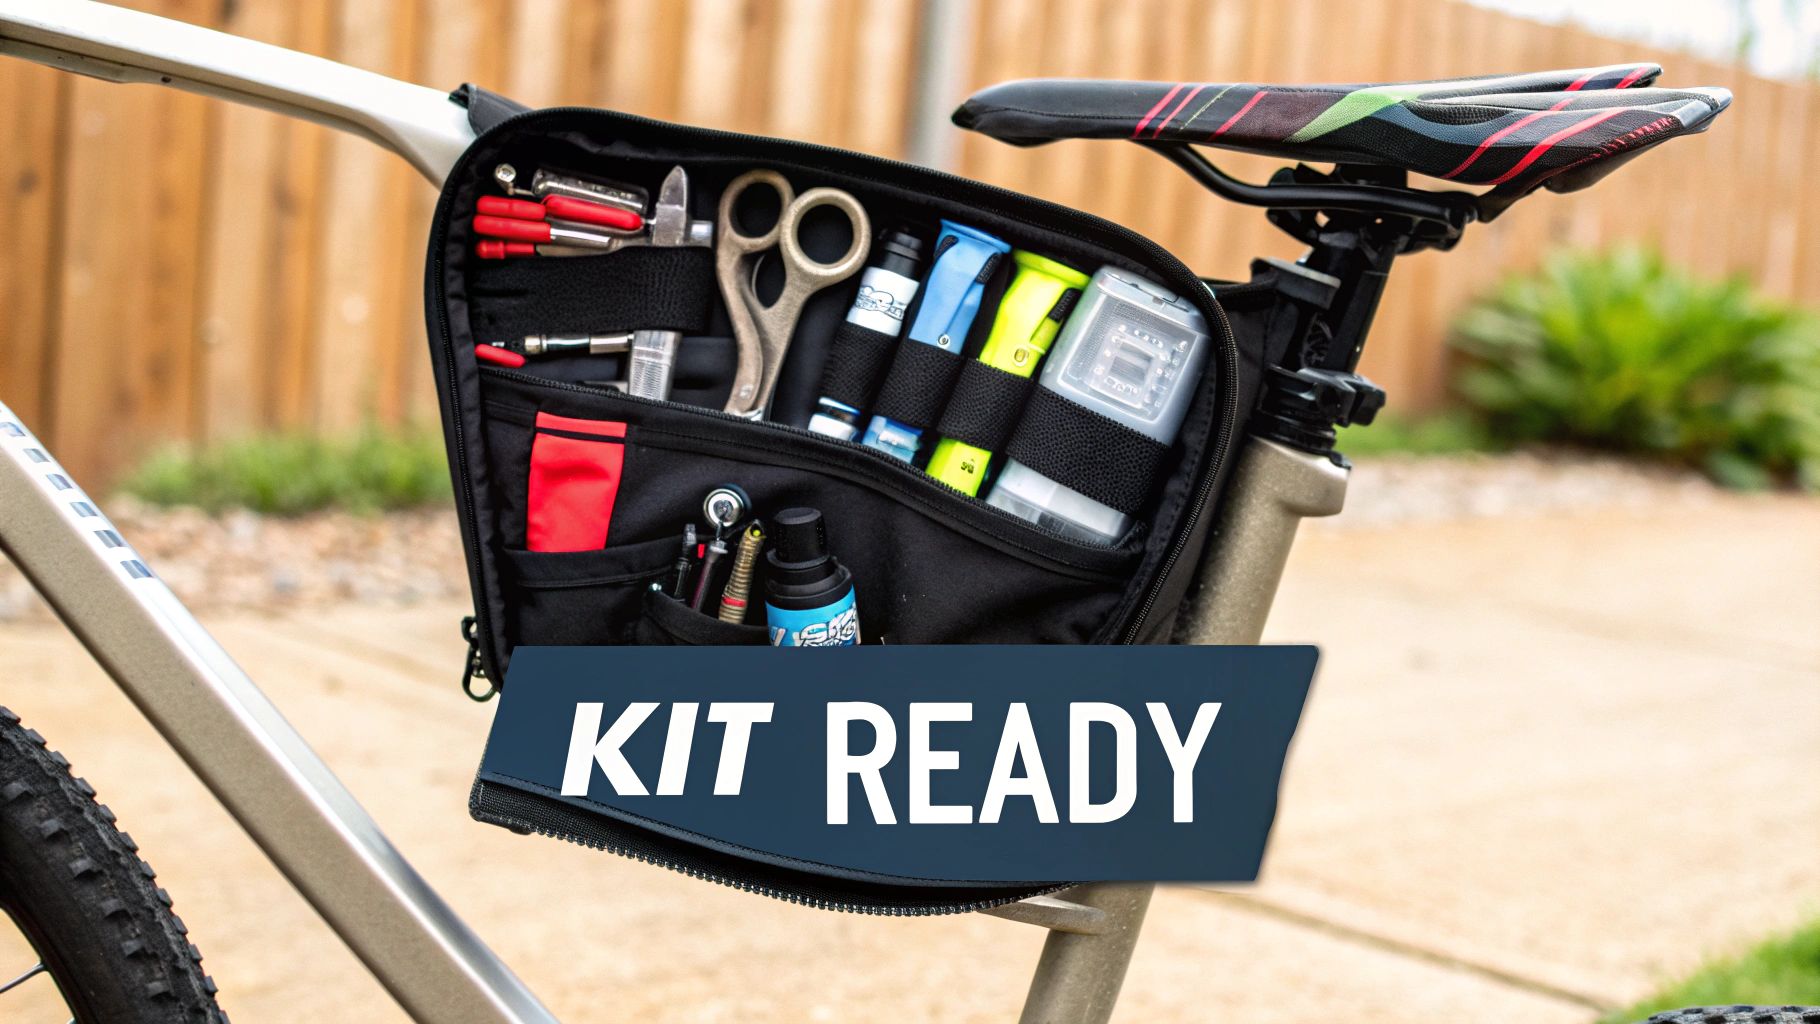
How you carry your kit really comes down to your personal riding style. A minimalist roadie might just need a small, sleek saddlebag. On the other hand, a mountain biker heading out for an all-day epic will probably want a full hydration pack with room for everything. Frame bags are a great middle-ground option that keeps the weight centered and low on the bike.
Whatever you choose, organization is everything. I like to wrap my tools in a small rag or use a dedicated tool roll. This stops them from rattling around, which not only prevents damage but also makes it way easier to find the one tool you need without emptying the whole bag on the side of the trail.
Creating a Pre-Ride Maintenance Routine
Your repair kit needs a little TLC, just like your bike does. Giving it a quick once-over every month or so is a smart habit. It helps you catch a problem, like a dried-up patch kit, before you're stuck on the side of the road. Think of it as a pre-flight check for your bike's safety net.
Here's what I always look at on my own kit:
- Patch Kit Inspection: Pop open your patch kit and make sure the glue hasn't turned into a solid rock. It happens more often than you'd think, and it makes the whole kit useless.
- CO2 Cartridge Check: Make sure your CO2 cartridges are still fully sealed and haven't been punctured. If you have a kitchen scale, you can even weigh them—a used cartridge is obviously much lighter.
- Tool Condition: After a wet ride, always wipe down your multi-tool to keep rust away. Give all the bits a quick wiggle to make sure nothing has seized up.
For extra protection, especially if you ride in all conditions, packing your gear inside durable dry bags before putting it in your main pack is a pro move.
A well-maintained kit is a reliable kit. Taking five minutes to check your gear at home can save you an hour of frustration on the trail. It’s a small investment with a huge payoff in preparedness and peace of mind.
And one last thing: restock any items you used on your last ride as soon as you get home. It’s way too easy to forget you used your only spare tube or last CO2 cartridge. By making this a habit, your kit will always be ready for your next adventure.
If you want to go even deeper on building a more comprehensive toolset for home repairs, check out our guide on the ultimate cycle maintenance kit.
Your Bike Repair Kit Questions Answered
When you're pulling together your first repair kit, a few classic questions always bubble to the surface. These are the exact debates you'll hear on group rides and in bike shops. Let's settle them so you can build your kit with confidence.
Getting these details right is all about finding that sweet spot between speed, reliability, and preparedness, all without weighing you down.
Spare Tube or Patch Kit?
Ah, the age-old question. The short answer? Both. They really serve two different purposes, and you'll be glad you have each of them at different times.
A spare tube is your get-out-of-jail-free card. When you get a flat, slapping a fresh tube in there is the absolute fastest way to get back to riding. You can worry about patching the old one later, when you're warm and dry at home, not kneeling in the mud.
A patch kit, on the other hand, is your super compact, lightweight backup. It's perfect for fixing that first punctured tube once your spare is already on the bike. Or, even worse, for that dreaded second flat on the same ride. Having both gives you the best of both worlds: a quick fix and a solid backup plan.
CO2 Inflators Versus Mini-Pumps
This one comes down to a classic trade-off: speed versus sustainability. A CO2 inflator is lightning fast. We're talking seconds to get your tire from flat to fully inflated with practically zero effort. On a cold, rainy day, that speed is a massive morale boost.
The catch, of course, is that each CO2 cartridge is a one-shot deal. Have a really bad day with multiple flats and you could easily run out. A mini-pump is the trusty, old-school alternative—it’s infinitely reusable and will never let you down, but it definitely takes more time and elbow grease.
What do most seasoned riders do? They carry both. Use the CO2 for the quick, hassle-free fix, and keep the mini-pump tucked away as a foolproof backup for when things really go sideways.
Do I Need a Torque Wrench on the Trail?
For a trailside fix? Absolutely not. A torque wrench is a precision tool meant for your home workshop, where you can be meticulous. It's crucial for safely tightening sensitive parts (especially on carbon frames) to the exact manufacturer specs.
Out on the trail, your multi-tool is all you need to get bolts "snug tight." That just means tight enough to get you home safely without anything rattling loose. Once you're back, you can pull out the proper torque wrench and double-check your work.
No matter what your ride throws at you, eBike Gang has the bikes and accessories to keep you rolling. Explore our collection of powerful e-bikes and gear up for your next adventure at https://ebikegang.com.